Step-by-Step Guide to a Salon worthy Manicure at Home
- Julia

- Mar 25, 2025
- 2 min read
Updated: Sep 25, 2025
"Don't underestimate the power of red nail polish" - Christian Louboutin

Perfectly manicured nails.
One of the best feelings in the world.
Hours in the salon and a hole in your wallet? Nopey nope.
Let me teach you how to get a mighty fine manicure at home.
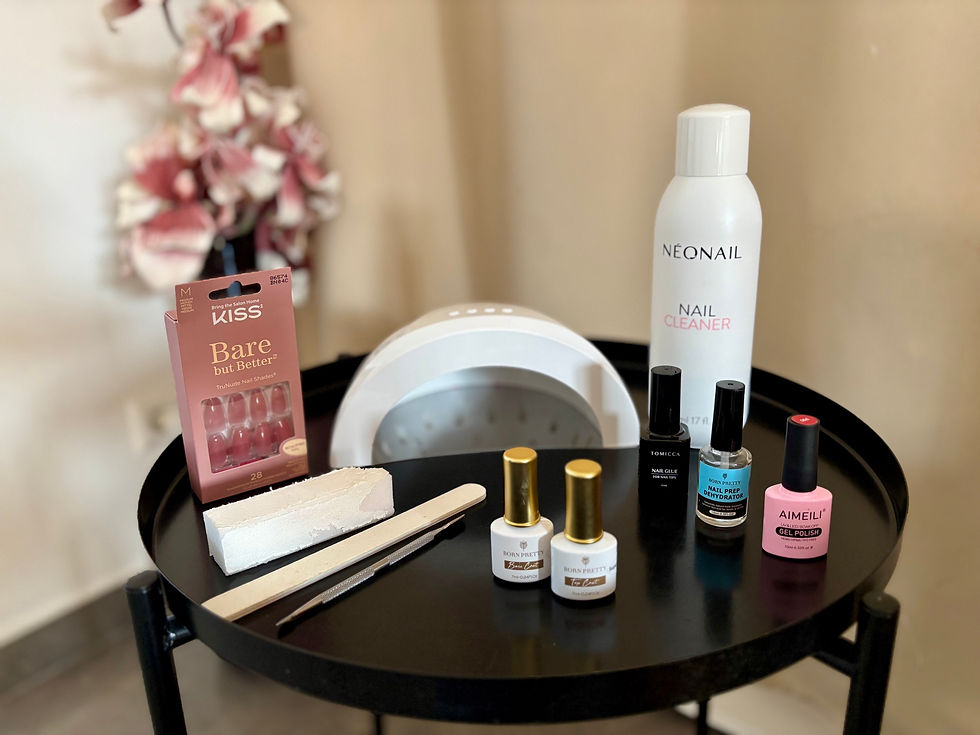
What you'll need:
&
a bit of time
audiobook/ podcast / music in the background
T U T O R I A L L O A D I N G . .

Push back cuticles with the cuticle pusher.
That's like saying "Flip the pancake with the pancake flipper."

Remove side cuticles, again, with this scary-looking device from hell.

Buff the nails with the nail buffer.
(I honestly can't stop laughing.)

Apply the Nail Prep Dehydrator for a perfectly prepped nail.
Select the right press on nail size and file it to fit your natural nail if needed.

Apply nail glue as if it were nail polish (not too little, not too much), press on the nail and hoooooooold it.....

Into the lamp we go for 120 seconds:
First, press the fake nail on tight for about 60 seconds. The last 60 seconds, let your nail enjoy the sun bath freely.

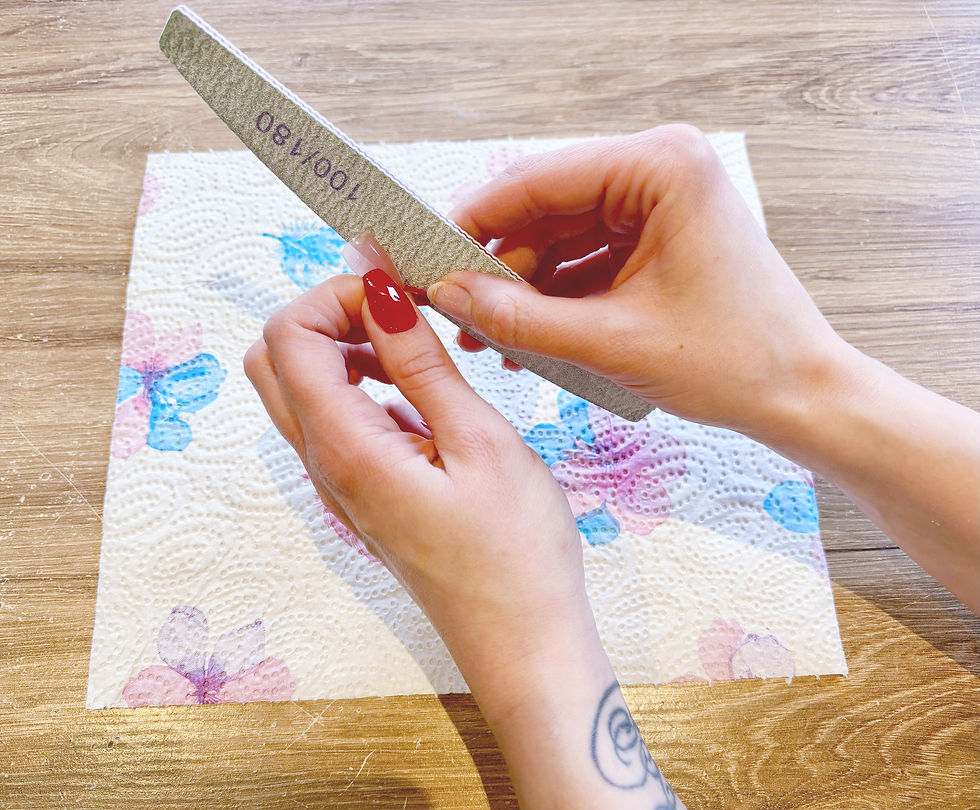
File them.
Dum roll please....
Looking faboulos.
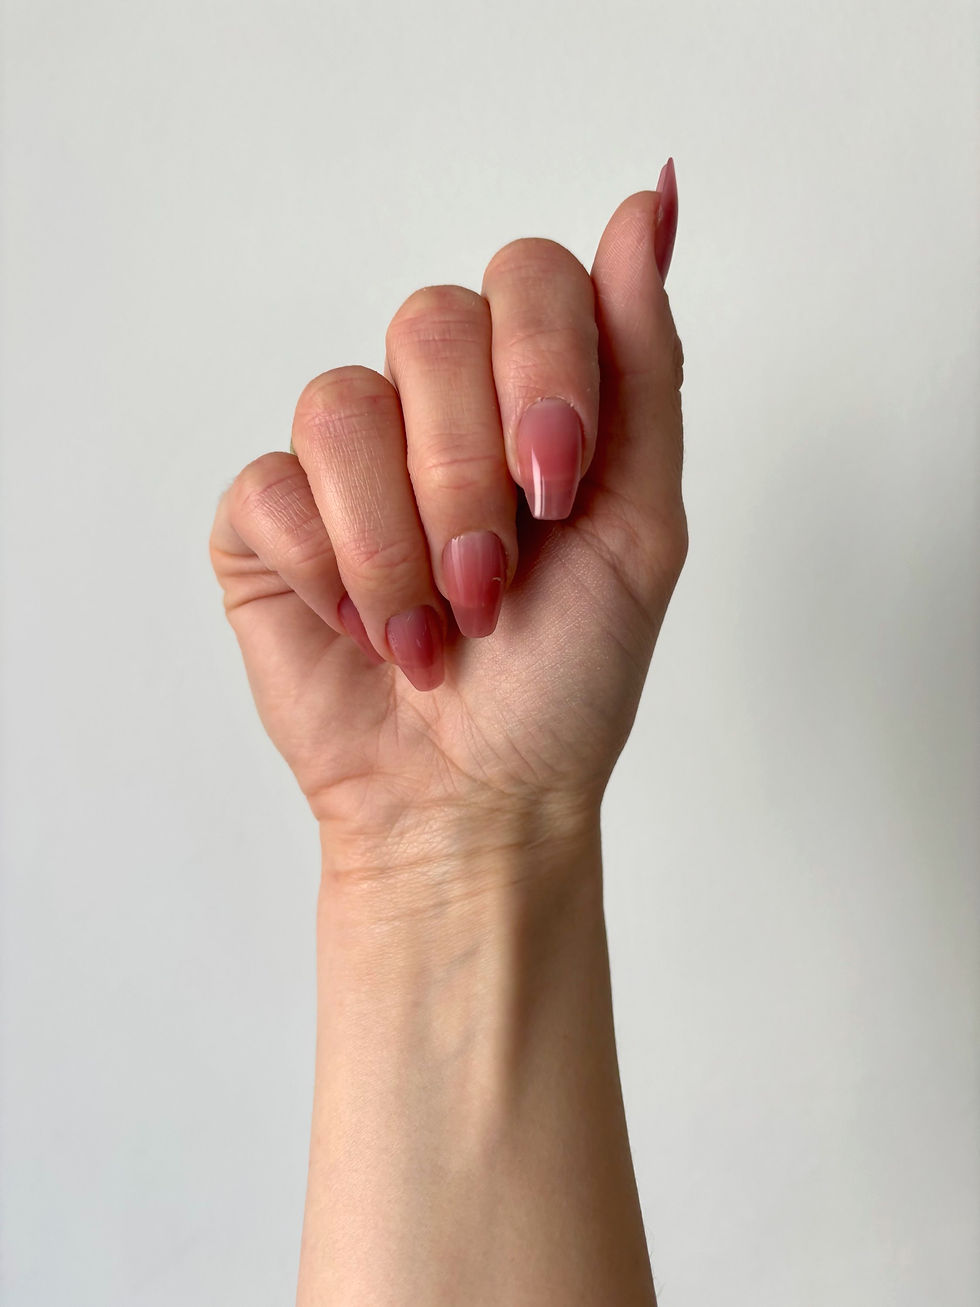
Now, you can stop here and enjoy your perfectly nude nails.
You could also buy nails that are already painted, but adding a little gel-lack usually looks better and more salon-y.
Now, as Massima's founder, editor, and number one representative, I choose:
Pillar box red!
(I had to Google what this even means.)

On goes the base coat.

And into the lamp for 120 seconds.

Let's paint the town red.
Into the magic lamp again. 120 seconds just to make sure.
A second coating, 'cause wer're professionals.
Also, I'm clearly not a professional, as you can see - I forgot the second coat and copied the picture from above.
You already know this part, right?

Le top coat. Don't apply too much, a little goes a long way with this one.
The last time, I promise.
At that point I usually start hating the process, but it will soon be over and you'll end up looking gorgeous.
Also, let's do our hands a favor and use UV protection gloves the next time.
I ordered these ones on Amazon: https://shorturl.at/eyCGk

This picture is just so hilariously aesthetically pleasing, that I had to include it. No, this is not sponsored by Néonail.
But it could be.
So, to the last step we go: The cleansing:

Take a cotton pad, soak it in cleaner and swipe away.
Taddaaa, you're done:

So fresh and so clean. Bravo!
You did it, Babe, I'm proud of you. Those will last you about 2 weeks or longer!
Fun Fact: They're great for scratching backs. Top Tip: Use gloves while doing the dishes.
Removal: After about 2 weeks it will be easy to pull them off carefully. Then, you can start the process all over again.
Here you go, you're welcome, Dear!
Stay fabulously polished and don't forget to blow lots of kisses.


Comments